In recent years Reinforcement Learning has shown a significant progress for many tasks from playing Atari games and Go to plasma control. However, many RL problems need the engineer to correctly define the reward function: how much reward to give an agent for each action? This process is called the reward engineering and it's one of the most difficult parts of mastering the RL solution. It might take a lot of engineering time and result in unexpected behavior from the agent (see reward hacking). In this post, we will learn how to train RL agents without any reward engineering using human judgements. For this purpose we'll implement the paper "Deep Reinforcement Learning from Human Preferences" by OpenAI and DeepMind using Toloka crowdsourcing platform and imitation Python package.
Inroduction
Reinforcement Learning
Reinforcement Learning is a special type of Machine Learning problems where an algorithm interacts with some environment and receives a feedback.
Thanks to many open-source projects, we can easily simulate the environment (see OpenAI Gym and MuJoCo) and train the state-of-the-art algorithm (see stable-baselines3). However, in order to do this, we need to correctly define the reward function $r$. It takes a lot of time and effort to provide a useful reward for complex tasks, so we'll do it by training a separate neural network as a reward predictor based on human judgements of AI's actions. We only need to collect these judgements. Of course, you can do it yourself or ask your friends or colleagues but it is not convinient and, what's more important, scalable way. There is a better solution: just use crowdsourcing!
Crowdsourcing
Crowdsourcing has become a reliable solution for many data collection problems. It's widely used for collecting both research and production labeled datasets. For instance, ImageNet, MS COCO, and SQuAD 2.0 were collected with crowdsourcing. Let's dive into how modern crowdsourcing platforms work.
Crowdsourcing platforms are two-sided markets: there are requesters who provide microtasks (e.g., an image and a list of possible classes) and assign a small price for its completion and workers who complete these tasks and earn money.
In this post, we'll use the Toloka crowdsourcing platform since it has low fees, a large number of workers, and a convenient Python API that's crucial for us because we want to automize our annotation process.
We'll discuss how to use the platform later. Now let's move on to implementing the solution.
Task
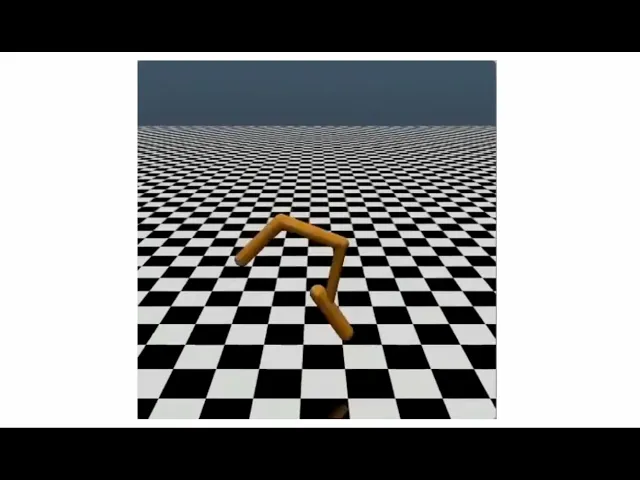
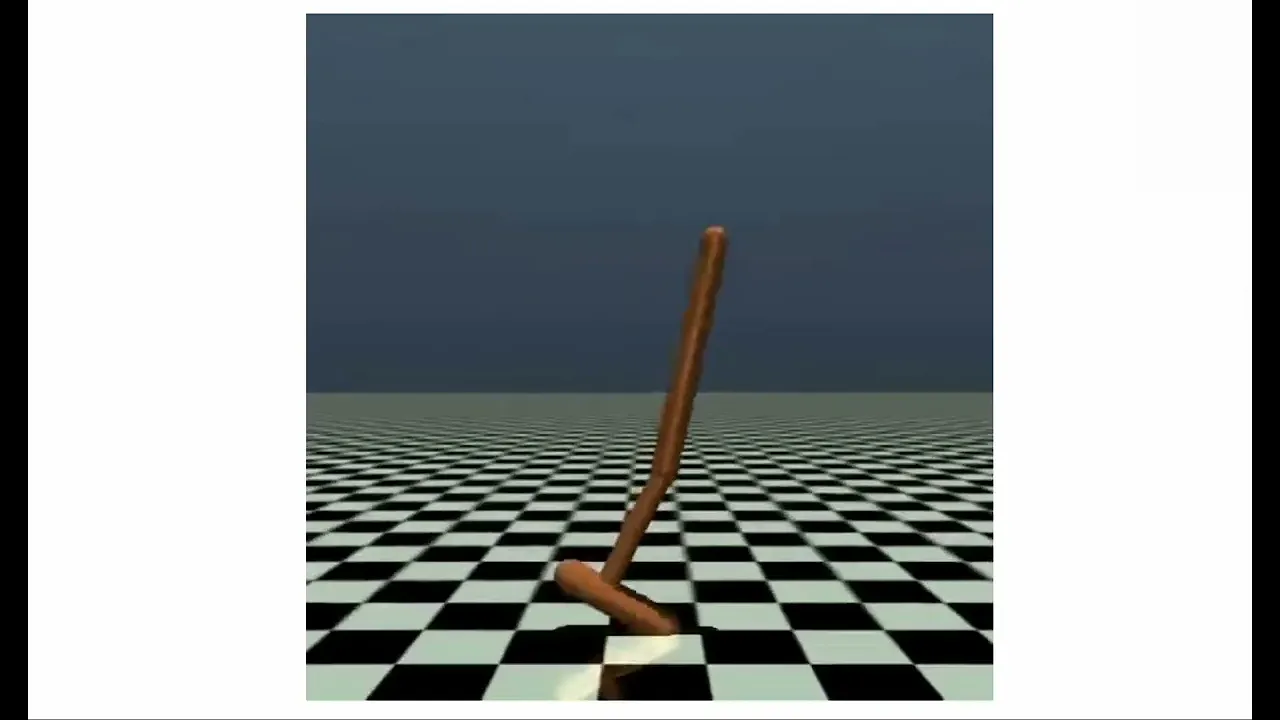
For the sake of example, we'll take a popular RL environment called Hopper provided by OpenAI Gym and MuJoCo and train an agent to do flips instead of walking. This follows the original paper and shows the problems of reward engineering: it's relatively simple to define a reasonable reward for walking (one can use the distance walked) but hard for flips since it's easy to explain what a backflip is to humans and difficult to mathematically measure its quality.
Method
We will follow the paper "Deep reinforcement learning from human preferences" by Christiano et al. The core idea of this method is to record some random video clips of agent's actions, ask crowd workers to compare them, and fit the reward predictor based on the annotation results. Now let's dive into each part.
Trajectories
What are, mathematically, these random video clips? They are sequences of environment state and actions the agent did in each state:
This is also called the trajectory. Now we want to compare trajectories. How can we define an order on them? The authors proposed to compare the cumulative reward of two trajectories:
whenever
Overview
Overall, the method can be described as follows:
The agent interacts with the environment according to its policy ππ. We train this policy with standard RL algorithm such as Proximal Policy Optimization using rewards predicted by r^r^
We sample pairs of trajectories of the agent interacting with the environment from the previous step and ask crowd workers to choose the best one
The network r^r^ is trained to predict rewards according to human judgments with standard supervised learning techniques.
Now let's look at the reward training procedure.
Reward Training
Now we can define the network's loss on this comparison using the Bradley-Terry model:
where
This loss forces the reward predictor to predict higher rewards for pairs of states and actions of the preferred trajectory. We will cover all the implementation details below.
Implementation
We will use the imitation Python package to implement this approach. It's a convenient and powerful library that implements various human-assistive RL approaches. Let's make a brief overview of the main parts of the final algorithm. We have two neural networks:
Agent. This network will predict the next best action.
Reward Net. A feed-forward network with a single output predicting rewards.
We also need several high-level modules:
Trajectory generator. This is some object that will provide us with trajectories on which we will train our reward predictor. In our case, this is the Agent Trainer because trajectories are generated during the agent's training.
Reward Trainer. A module defining the reward net training procedure.
Fragmenter. This module will split the trajectories into pairs of smaller fragments since it's more convenient to humans to judge short clips.
Preference Gatherer. A module that will send pairs of clips to Toloka and fetch the comparisons' results.
Finally, the overall logic of the algorithm will be incorporated into the Preference Comparisons module. The imitation package is now under heavy development, so we can reuse some of the modules from it but for other modules we'll also need to make changes to them to align the implementation with the original paper.
To implement all these modules, we need to install all the necessary packages.
# First,you need to install MuJoCo. Youcan trythisguide https://neptune.ai/blog/installing-mujoco-to-work-with-openai-gym-environments
# Also,check out the PyTorch installation page to make sure it matches your CUDA version https://pytorch.org/get-started/locally/pip install imitation gym[all]toloka-kit crowd-kit
Let's look at the implementation of each part of the approach.
Agent
We use a simple Feed Forward policy network that will be trained with the Proximal Policy Optimization algorithm (PPO). This method is a reliable baseline for various RL tasks and we can reuse an implementation from stable-baselines 3.
importsealsimportgymfromimitation.policies.baseimportFeedForward32Policy,NormalizeFeaturesExtractorfromimitation.util.networksimportRunningNormfromstable_baselines3.common.vec_envimportDummyVecEnvfromstable_baselines3 importPPO
# First,we need to define an environment. Weuse Hopper environment
# wrapped by seals package.
venv = DummyVecEnv([lambda:gym.make("seals/Hopper-v0")] * 8)
# Second,we define the agentsagent = PPO(policy=FeedForward32Policy, # Our feed-forward policypolicy_kwargs=dict( # We just normalize state vectors and use themas features
features_extractor_class=NormalizeFeaturesExtractor,features_extractor_kwargs=dict(normalize_class=RunningNorm),),env=venv,seed=0,n_steps=2048// venv.num_envs,batch_size=1024,ent_coef=0.0,learning_rate=0.0003,n_epochs=10)
Reward Net
For reward predictor, we also use a feed-forward network:
from reward_nets importBasicRewardNetreward_net = BasicRewardNet(venv.observation_space, # The features here are concatenation of statevenv.action_space, # and action vectors.
normalize_input_layer=RunningNorm)
from reward_nets importBasicRewardNetreward_net = BasicRewardNet(venv.observation_space, # The features here are concatenation of statevenv.action_space, # and action vectors.
normalize_input_layer=RunningNorm)
The idea here is the following. After we gathered the comparisons, we make a train-test split of them and send 67% to the training set and 33% to the validation. We train our reward net until validation loss stops decreasing. The original paper's authors proposed a trick to avoid significant overfitting and, at the same time, make sure that the loss is changing: adjust the L2 regularization coefficient to make the validation loss 1.1-1.3 times higher than the training loss. I did it in the following way: after the training has stopped, we multiply the weight_decay parameter by 2 if the validation loss is more than 1.3 higher and by 0.5 otherwise.
Here you can see the changes to the imitation's class (they just train the model for a fixed number of epochs). For the full code please go to the attached repo.
def _update_weight_decay(self,factor):forginself.optim.param_groups:g['weight_decay'] *= factordef _train(self,train_dataset: PreferenceDataset,val_dataset: PreferenceDataset,epoch_multiplier: float = 1.0):"""Trains for `epoch_multiplier * self.epochs` epochs over `dataset`."""
# TODO(ejnnr):This isn't specific to the loss function or probability model.
# In general,it might be best to split the probability model,the loss and
# the optimization procedure a bit more cleanly so that different versions
# can be combinedtrain_dataloader = th.utils.data.DataLoader(train_dataset,batch_size=self.batch_size,shuffle=True,collate_fn=preference_collate_fn,)val_dataloader = th.utils.data.DataLoader(val_dataset,batch_size=self.batch_size,shuffle=True,collate_fn=preference_collate_fn,)val_loss_history = []while True:train_loss = 0.0forfragment_pairs,preferencesintrain_dataloader:self.optim.zero_grad()loss = self._loss(fragment_pairs,preferences)loss.backward()train_loss += loss.item()self.optim.step()self.logger.record("loss",loss.item())train_loss /= len(train_dataloader)val_loss = 0.0withth.no_grad():forfragment_pairs,preferencesinval_dataloader:loss = self._loss(fragment_pairs,preferences)val_loss += loss.item()self.logger.record("val_loss",loss.item())val_loss /= len(val_dataloader)val_loss_history.append(val_loss)iflen(val_loss_history) >= 4:ifval_loss_history[-4] <= val_loss:breakfrac = val_loss / train_lossiffrac > 1.3:self._update_weight_decay(2.0)else:self._update_weight_decay(0.5)print(f'Train loss: {round(train_loss, 4)}, val loss: {round(val_loss, 4)}')
Fragmenter
To split trajectories into segments, the paper's authors proposed to use an ensemble of reward prediction nets and choose pairs of fragments with a high variance of predictions. We'll simplify it and will follow the imitation's implementation of simple random sampling.
This is the most interesting and difficult part of the method. Let's take a look at what this module should do in general.
Take trajectories and transform them into video clips
Upload video clips to some web storage such as S3
Upload the annotation tasks to Toloka
Process the annotation results
Let's figure out how Toloka works. First, I suggest you take a look at the official requester's guide. After you've done this, you are ready to run the annotation.
Creating a project
In the beginning, we need to create a project. In this step, you need to choose the name and description of your project, which are visible to workers. I named my project "Help AI to Play Games (Robot Backflip)".
The next part is configuring the task's interface. We have two links to videos, so we want to place them side-by-side and add a radio button for choosing one of them. Luckily, Toloka has a built-in component layout.side-by-side for this purpose.
Here is the final config:
{"view":{"type":"layout.side-by-side","items":[{"type":"view.video","validation":{"type":"condition.played","hint":"Play the video"},"url":{"type":"data.input","path":"video1"}},{"type":"view.video","validation":{"type":"condition.played","hint":"Play the video"},"url":{"type":"data.input","path":"video2"}}],"controls":{"type":"view.list","items":[{"type":"field.button-radio-group","label":"Which clip shows better AI actions?","options":[{"label":"A","value":"left"},{"label":"B","value":"right"},{"label":"Failed to load","value":"error"}],"validation":{"type":"condition.required","hint":"choose one of the clips"},"data":{"type":"data.output","path":"result"}}]}},"plugins":[{"1":{"type":"action.set","data":{"type":"data.output","path":"result"},"payload":"left"},"2":{"type":"action.set","data":{"type":"data.output","path":"result"},"payload":"right"},"3":{"type":"action.set","data":{"type":"data.output","path":"result"},"payload":"error"},"q":{"type":"action.play-pause","view":{"$ref":"view.items.0"}},"w":{"type":"action.play-pause","view":{"$ref":"view.items.1"}},"type":"plugin.hotkeys"},{"type":"plugin.toloka","layout":{"kind":"scroll","taskWidth":1000}}]}
{"view":{"type":"layout.side-by-side","items":[{"type":"view.video","validation":{"type":"condition.played","hint":"Play the video"},"url":{"type":"data.input","path":"video1"}},{"type":"view.video","validation":{"type":"condition.played","hint":"Play the video"},"url":{"type":"data.input","path":"video2"}}],"controls":{"type":"view.list","items":[{"type":"field.button-radio-group","label":"Which clip shows better AI actions?","options":[{"label":"A","value":"left"},{"label":"B","value":"right"},{"label":"Failed to load","value":"error"}],"validation":{"type":"condition.required","hint":"choose one of the clips"},"data":{"type":"data.output","path":"result"}}]}},"plugins":[{"1":{"type":"action.set","data":{"type":"data.output","path":"result"},"payload":"left"},"2":{"type":"action.set","data":{"type":"data.output","path":"result"},"payload":"right"},"3":{"type":"action.set","data":{"type":"data.output","path":"result"},"payload":"error"},"q":{"type":"action.play-pause","view":{"$ref":"view.items.0"}},"w":{"type":"action.play-pause","view":{"$ref":"view.items.1"}},"type":"plugin.hotkeys"},{"type":"plugin.toloka","layout":{"kind":"scroll","taskWidth":1000}}]}
The next part of building an interface is to define the input and output data format. We have two URLs and one text output:
The final step of the project's configuration is writing the instruction. It is the most important step. Here you need to explain to the workers what the agent needs to do. You might think about it as replacing the mathematical definition of reward with the definition in natural language. Your instruction should cover:
The detailed explanation of how to judge a pair of trajectories
How to deal with corner cases
How to deal with technical difficulties (e.g. videos are not loading)
Perfectly, an example of an ideal agent's behavior
Since workers see the task for the first time, we need to show them how to complete it in practice. For this purpose, we employ training tasks. This is a special type of task on Toloka for which you provide the correct response and a hint that will show up when a worker answers incorrectly. You can use random video clips of the agent's actions and annotate them by yourself. Make sure that they are not too difficult. You might skip the training setup since it takes some time. However, I'd suggest you not run the project without a training attached because it will be more difficult to configure the quality control afterward. So, let's create it!
First, go to the "Training" tab on your project's page. Then, click "Add training". Now we need to configure the training pool. You can use my setting here.
Finally, we need to upload our training tasks. They must be in a TSV file with the following structure.
Input values. This is what you provide as input. In our case, it's two links to videos. These values are written in INPUT:<input_name> columns.
Golden outputs. This is the correct response for a task. It should be placed in column GOLDEN:output_name.
Hint. The message to show a worker in case of an incorrect answer. Placed into column HINT:text.
To upload the tasks, click "Upload", select smart mixing and set the number of tasks on a single page. In our case, we will place all the training tasks on one page, so this number will be 10. Then, click "Upload" and choose your TSV file.
Pool Configuration
Now we will create a pool where the real tasks will be uploaded. To do this, you need to go to the project page and click "Add pool". Here we will configure the quality control.
Here's what we're going to set here
Allow only those workers who chose English as their spoken language
Choose the training quality threshold. I use 80% which means only workers who completed 80% of training tasks correctly (on the first try) are allowed to complete real tasks
Set up real-time quality control. We will ban workers who answer too fast and those who do not agree with the majority very often
Set the price for one page of tasks. This depends on your budget. I suggest setting $0.01-0.02 here
Set the overlap size. This means how many workers will complete the same tasks. This is necessary to reduce the noise we can get in a case when a single worker completes the task. Larger sizes mean better quality but also higher cost. 3-5 will be fine here.
That's it. Now let's discuss how we will implement gatherer.
What's going on here? The gatherer receives a set of trajectory pairs. We need to transform them into videos. To do so, we use the Monitor wrapper in gym setting the initial state to the first trajectory observation and do trajectories actions one by one.
After that, the resulting videos are uploaded to the S3 bucket. You can use any S3 storage you want. The only necessary things here are AWS Key ID, AWS Secret Access Key, connection URL, bucket name, and base URL to the uploaded files. Please go to your cloud provider's documentation to get all of them.
Finally, we use the Toloka-Kit package to do the following:
Clone the pool we created previously
Upload the tasks into the pool
Wait until completion
Download results and aggregate them using Majority Voting (for each task choose the most popular label)
To get the Toloka token, go to the "Profile" page -> Integrations -> Get OAuth token. You can find your pool ID in the URL of the created pool's page that looks like .../requester/project/<project_id/pool/<pool_id>.
Preference Comparisons
The only change we need to do there is to add a validation dataset to the imitation package. You can find the changed module here.
That's it, make sure you have enough money on the Toloka account. It might be helpful to set small numbers in the snippet above to debug the code first without spending too much money.
Results
The training takes some time but after a while, you'll get the trained agent and reward predictor. Below you can see the result of my run.