Reviewing Performers' Responses: Manual and Automatic Methods

Subscribe to Toloka News
Subscribe to Toloka News
There are two ways to accept tasks completed by performers in Toloka: automatic acceptance (the response is accepted immediately after the performer submits it) and non-automatic acceptance (the response is accepted after the requester reviews it). Let's look at how these methods differ, which types of tasks they work best on, and how to review tasks with non-automatic acceptance quickly and efficiently.
Automatic acceptance
This method works well for simple tasks with overlap, where you can automatically check the correctness of responses using control tasks and other quality control rules. You can use automatic acceptance in tasks for classifying images, videos, and texts, moderating content, or evaluating search relevance. As soon as the performer submits a response, the task is considered accepted and payment is credited to the performer's account. You won't be able to get this money back, so it's important to monitor performers directly in the interface and set up quality control carefully.
You can check the following performer actions in the interface:
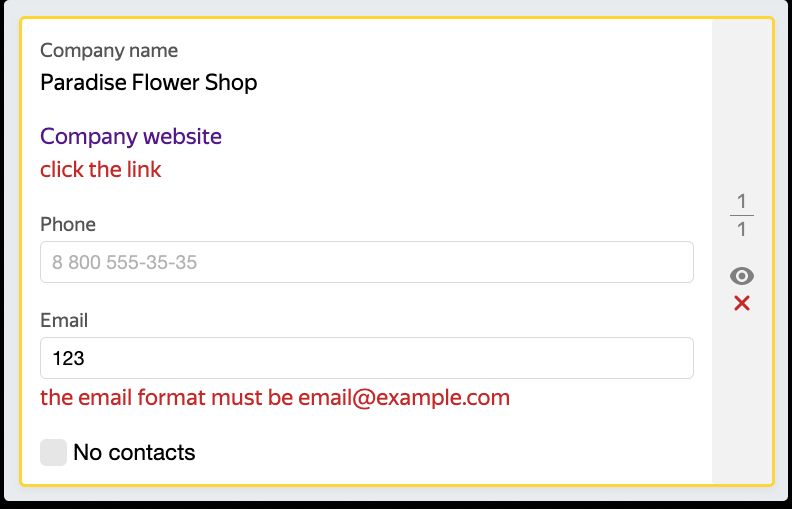
- Playing media content (to make sure that the performer actually watched a video or listened to an audio clip). If the performer needs to play the entire content in order to complete the task, also check the duration of playback.
- Clicking external links.
- Answering certain questions in the task.
- The format of data entered by the performer (email, phone number, or date).
If you check responses in the interface, performers will be more likely to follow the instructions and less likely to make errors, so you'll get better quality of responses. Using quality control rules, you can filter out performers who submit incorrect responses directly when they're labeling data. You can ban these performers from the project and ignore their responses when downloading the results from the pool or use result aggregation.
When not to use automatic acceptance
Auto acceptance doesn't work for tasks where performers need to:
- Select an image area.
- Write texts.
- Perform field tasks.
- Record audio, shoot a video, or do other tasks that require attaching a file.
This is because control tasks and majority vote check for exactly matching responses. You can't automatically check the content of files or things like point coordinates in images — there may be a wide variety of correct responses. These types of tasks require non-automatic acceptance (manual review).
Non-automatic acceptance
This method is used when responses can't be checked automatically. This is usually the case with field tasks, creative tasks, and tasks for creating content (video, audio, or photos). You need to review the performer's responses and decide if they are appropriate. The performer will be paid for the tasks you accept and won't be paid for those you reject.
You don't have to manually review all the tasks yourself. If a project involves reviewing thousands of tasks, you can simplify and automate the process. We'll walk you through the steps.
Method 1: Manually in the interface
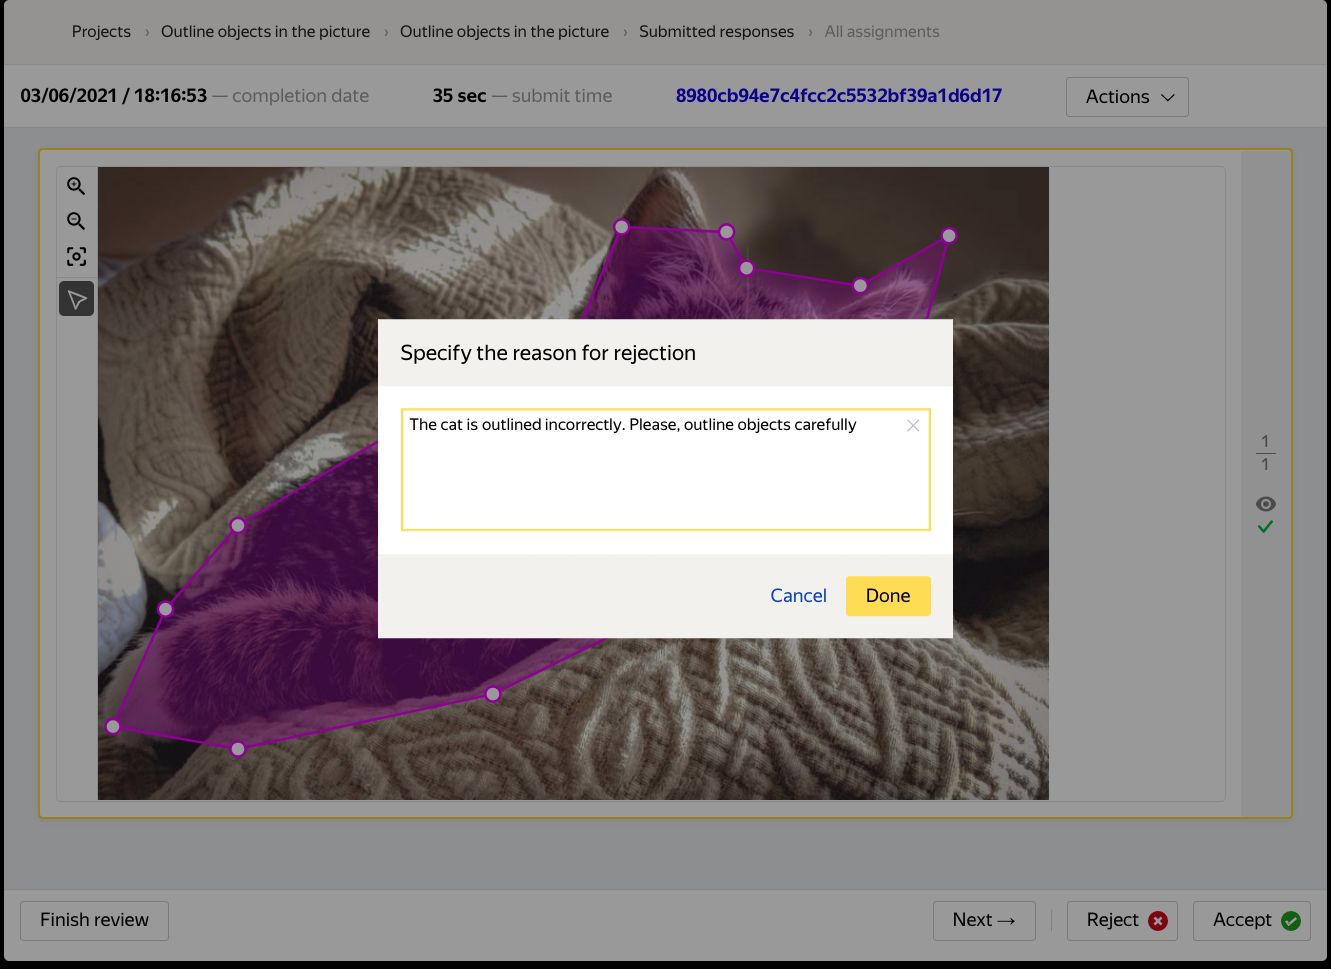
If there aren't too many tasks and this is a one-time labeling project, the easiest way is to review them manually:
- Click Review assignments on the pool page.
- View the performer's responses and then click Accept or Reject.
- Leave a comment on the responses you rejected: explain to the Toloker what was incorrect and how they didn't follow the instructions.
Method 2: In the TSV file with the results
This method works well if you need to review a lot of responses, filter the results first, or process them programmatically. Use it to filter out meaningless or senseless comments, calculate the majority vote, or ignore responses submitted by cheating performers.
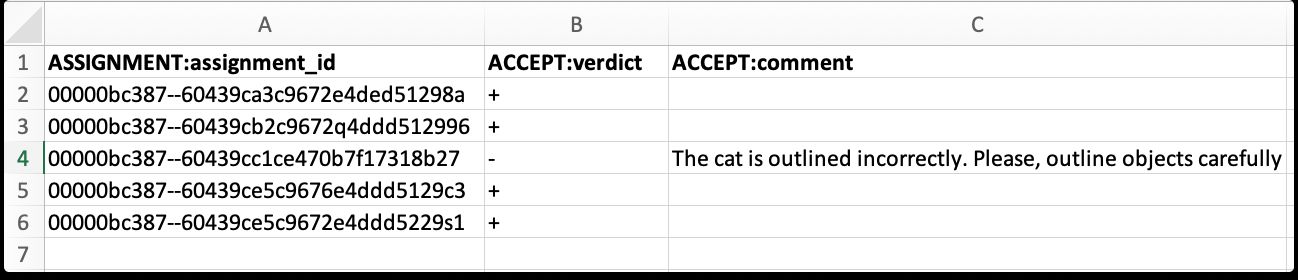
- Download the TSV file with responses from the pool page.
- For the ones you rejected, add a comment explaining the reason in ACCEPT:comment. accepted responses and "-" for rejected responses.
- For the ones you rejected, add a comment explaining the reason in ACCEPT:comment.
If each task page (suite) has multiple tasks, they'll have the same ASSIGNMENT:assignment_id. This is the unique ID of the page with responses, so you first need to decide whether to accept the entire task suite. Add the plus or minus sign for each task on the page, count the total, and then leave only one line per assignment_id in the file. If there are more correct responses in the task suite than incorrect ones, accept it. Otherwise, reject it.
- Upload the prepared TSV file with the verdicts to Toloka and you'll have the responses reviewed.
Make sure to remove extra lines. If you upload a file with duplicate assignment_ids, the system will randomly select one of these lines and apply its verdict to the entire task suite, either accepting or rejecting it. In this case, after processing the file, some tasks may get a status different from the one you expected.
If users attach audio, video, or image files to their responses, it's not convenient to review them using a TSV file. You'll have to download the files, view them, and then enter the verdict in the appropriate line. For tasks like that, it's better to review responses in the interface or use method 3.
Method 3: Engaging Tolokers under a separate project
This method is worth using if your projects are large, with a continuous data labeling pipeline. If desired, you can automate the pipeline method via the API and free up time to focus on higher-level tasks.
To have responses reviewed by Tolokers, create a separate project where you'll show other performers the responses received and ask them to evaluate if the task was completed correctly. For example:
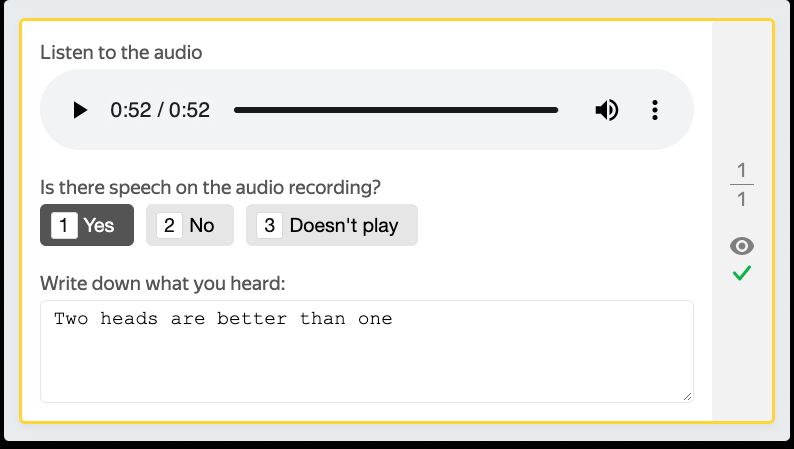
- In the first project, performers are asked to record voice, so in the second project, other performers need to listen to the audio recording and answer if the phrase was recorded correctly.
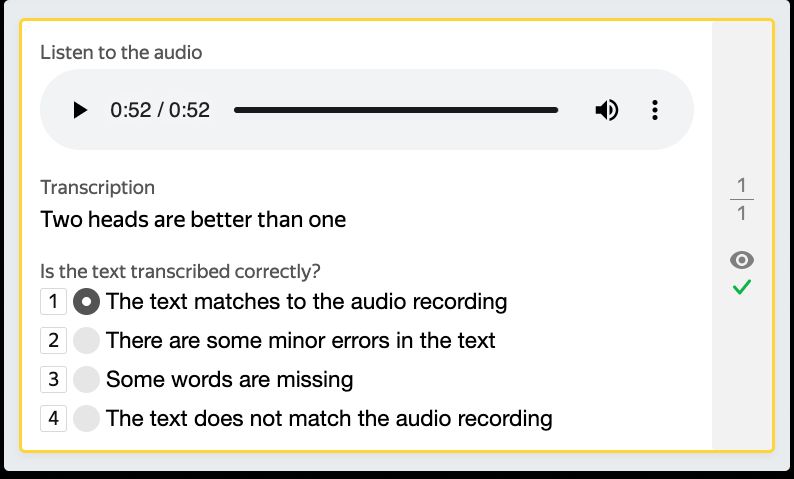
- In the first project, performers transcribed what they heard in an audio recording. To review their responses, other performers should listen to the recording, compare it with the transcribed text, and mark if there are any errors.
Project 1:
Project 2:
The process may differ depending on the type of task, but these are the general steps for using Tolokers to review responses:
- If performers sent you files in the first project, download these files along with TSV files and then upload them to any cloud platform. This way, you can get direct links to the responses and show them to the performers in the task.
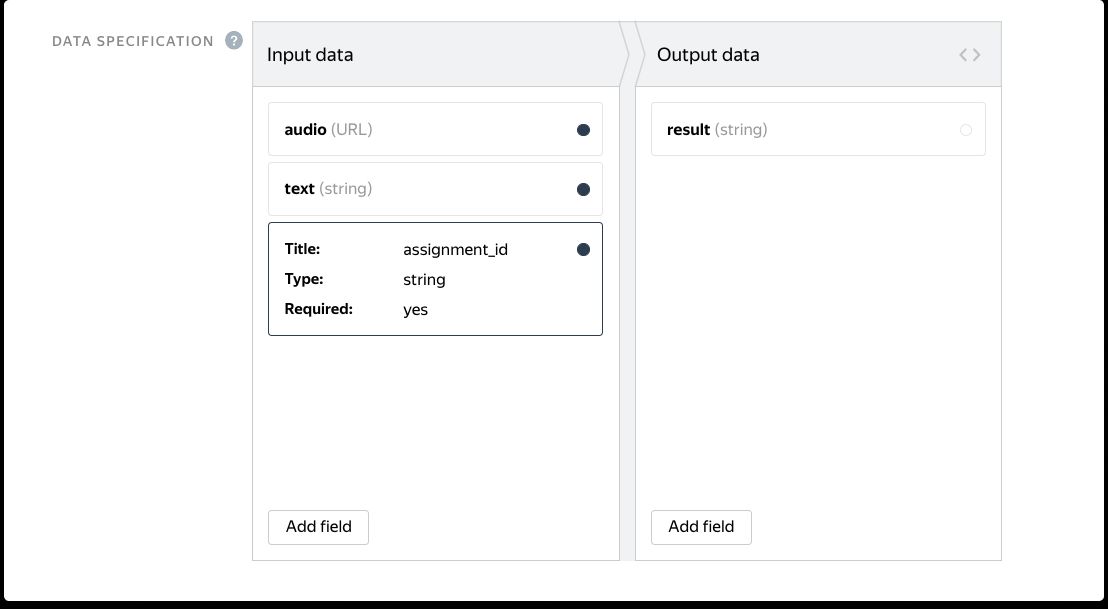
- Create a task interface so that the performers can see the data from the previous project (source data and submitted responses). Don't forget to add the hidden ASSIGNMENT:assignment_id input field: the performer won't see it, but it will make it easier for you to match verdicts to assignments.
- In the instructions, add the task requirements and criteria for evaluating the results: what is considered correct and what is not.
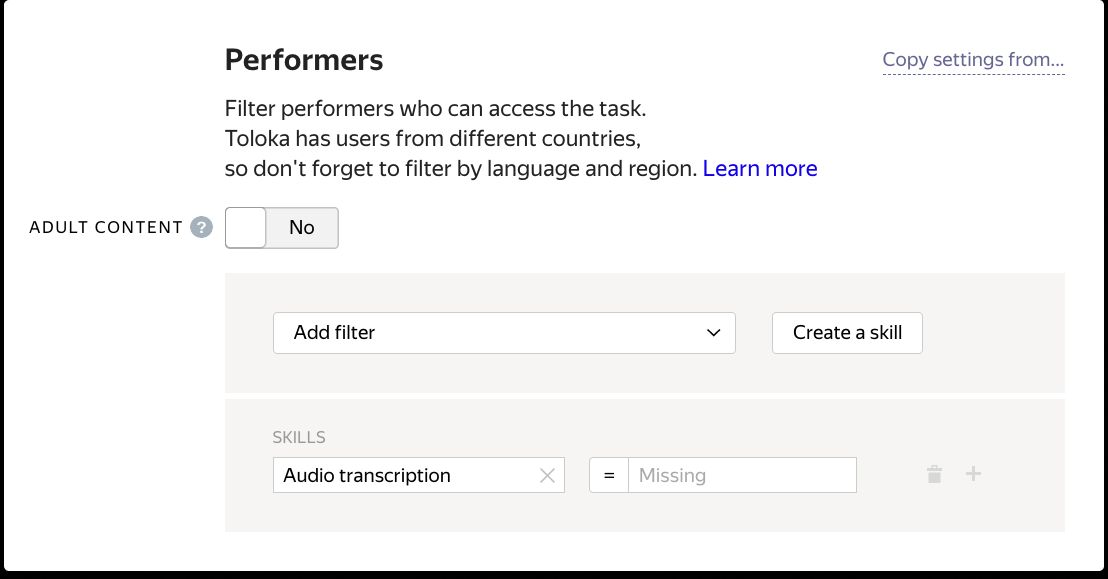
- Assign a skill to all performers who completed tasks in the first project. In the second project, add a filter for selecting performers with no skill. This ensures that the performers won't be able to review their own tasks.
- Set up automatic acceptance, an overlap of 3, or dynamic overlap in the pool.
- Upload tasks to the pool and start it.
- When the pool is fully completed, start aggregation of results.
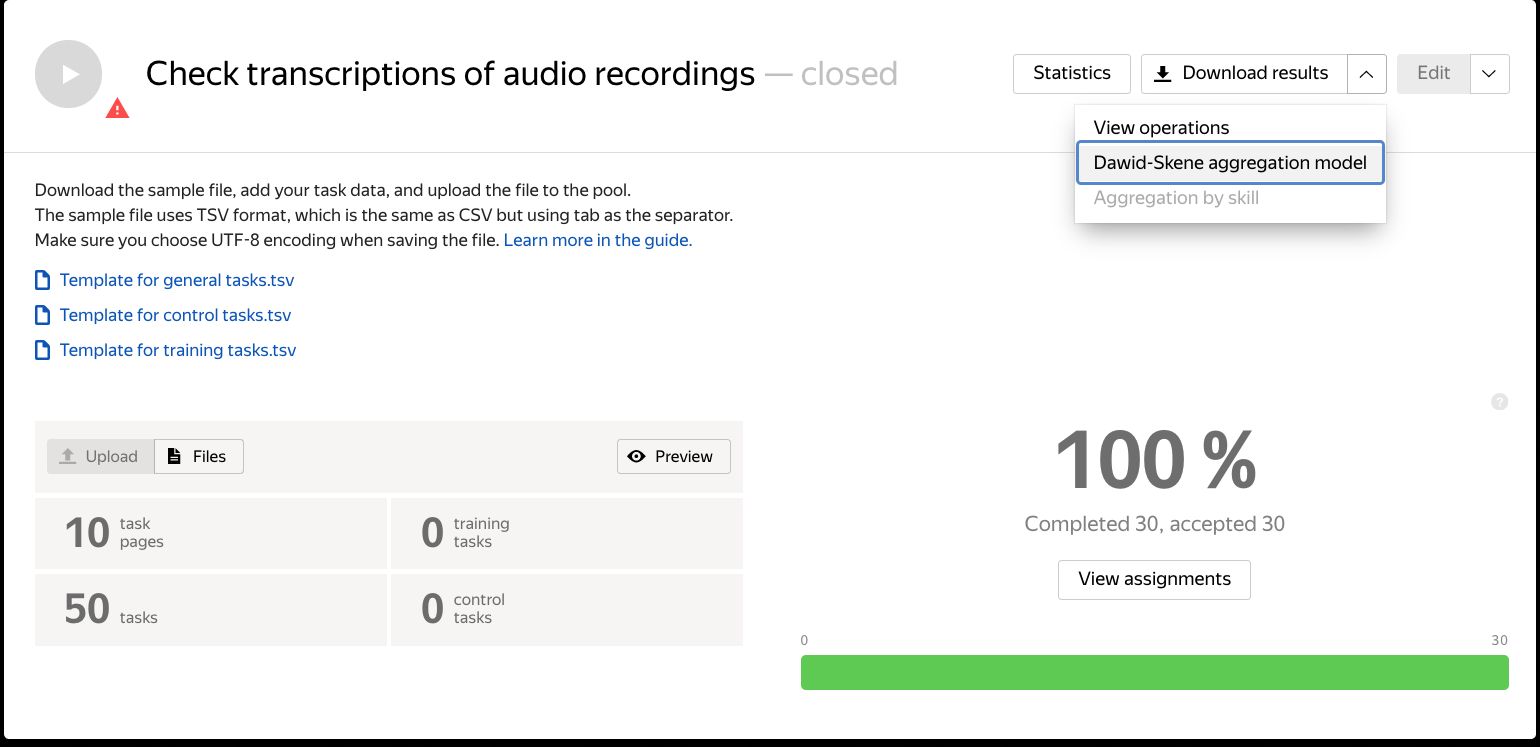
- Use the aggregated data to prepare and upload a file with the review results (the same as in method 2).
Method 4: Using the API
You can use the API to perform non-automatic acceptance. To accept or reject submitted responses, change the status of the task suite using a PATCH request to the resource /assignments/<task suite assignment ID>:
- Accept the responses: change SUBMITTED to ACCEPTED.
- Reject the responses: change SUBMITTED to REJECTED.
- Change a rejection decision: change REJECTED to ACCEPTED.
Note: You can't accept or reject all tasks by pool ID. You need to specify the assignment ID.
Semi-automatic acceptance
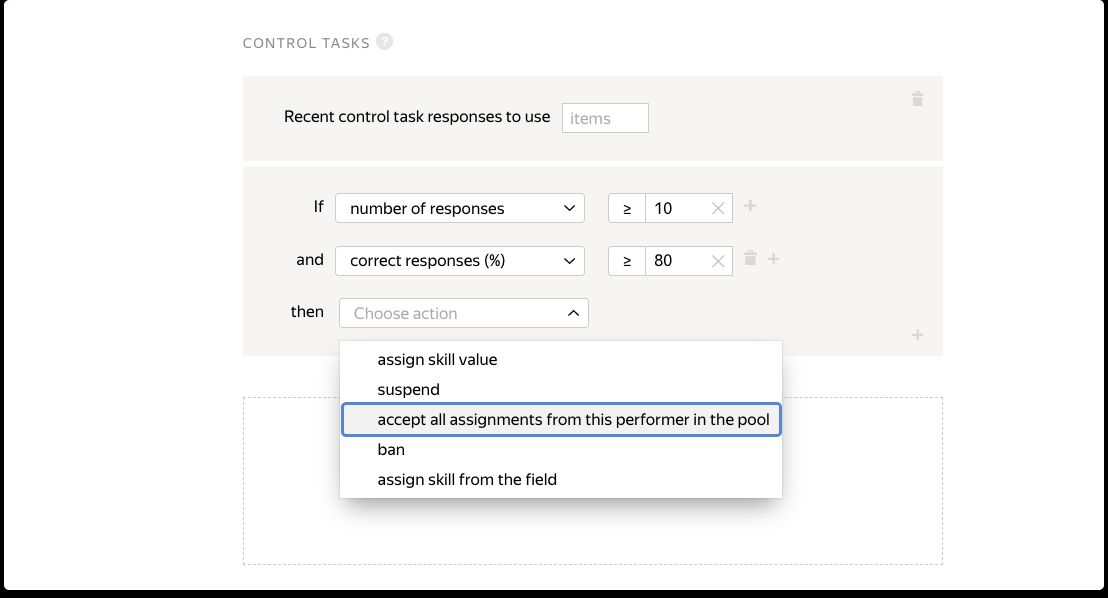
This is a combination method for reviewing responses: some completed tasks are accepted automatically based on a quality control rule and the rest are reviewed using one of the methods listed above. If you check performers using control tasks, add a rule for the pool to accept all responses from users who do the task well, like 80% quality or higher. You can decide what level of performer quality you trust. Likewise, you can set up the "Majority vote" rule to accept all responses that match the responses of other performers.
Important points to remember when reviewing responses
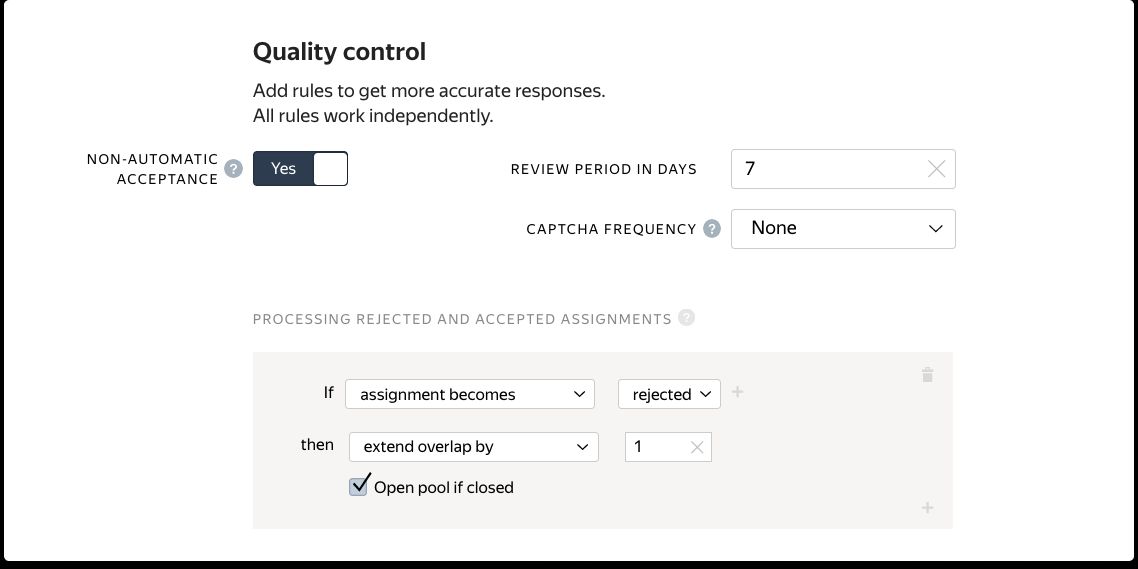
- The performer can submit an appeal asking you to re-check and accept rejected responses. This can be done within 7 days after a response is rejected. If you rejected the responses by mistake, accept them. If not, send a message to the performer and explain what they did wrong. Next time they will be more careful. Review all appeals and respond promptly, within 9 days of rejecting the response.
- You can automatically send rejected tasks for re-completion using the Processing rejected and accepted assignments rule.
- You can accept a previously rejected response, but you can't reject an accepted one. Be careful when accepting responses.
- You can't change the task status if the task pool was archived. Note: If there is no activity in the pool for a month, it is archived automatically.
- Responses are downloaded from the pool in TSV format. If you need them in JSON format, use the API.
- If responses include files uploaded by performers, you can download them from the pool in a ZIP archive. Click Download results / Download attachments on the pool page. The archive will contain folders labeled with the assignment IDs that contain the files. File names are assigned automatically when uploading the files and you can't change them. You'll find the names of attachments in the TSV file with the responses, in the output fields they were uploaded to.
Toloka gives you fast and convenient ways to review responses for any type of task. If you still have questions, contact us and we'll help you choose the right settings for your project.

Recent articles


Have a data labeling project?
